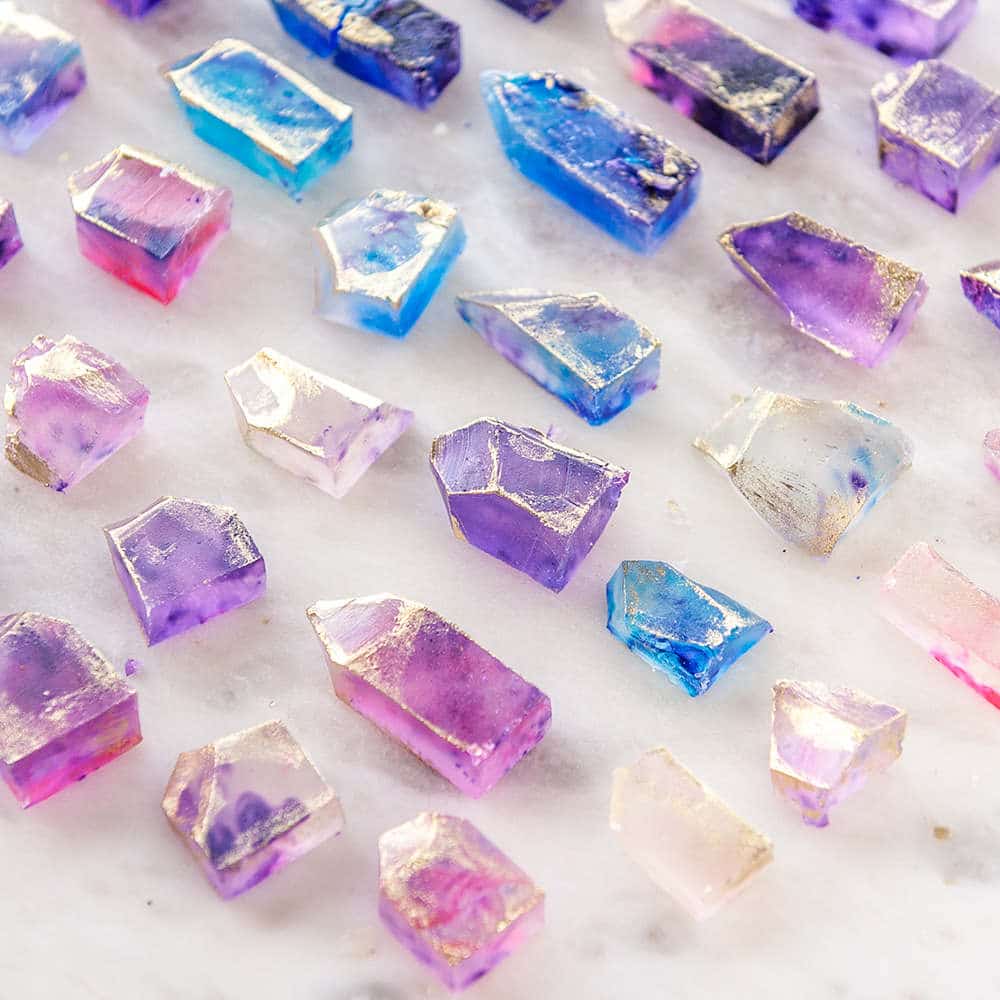
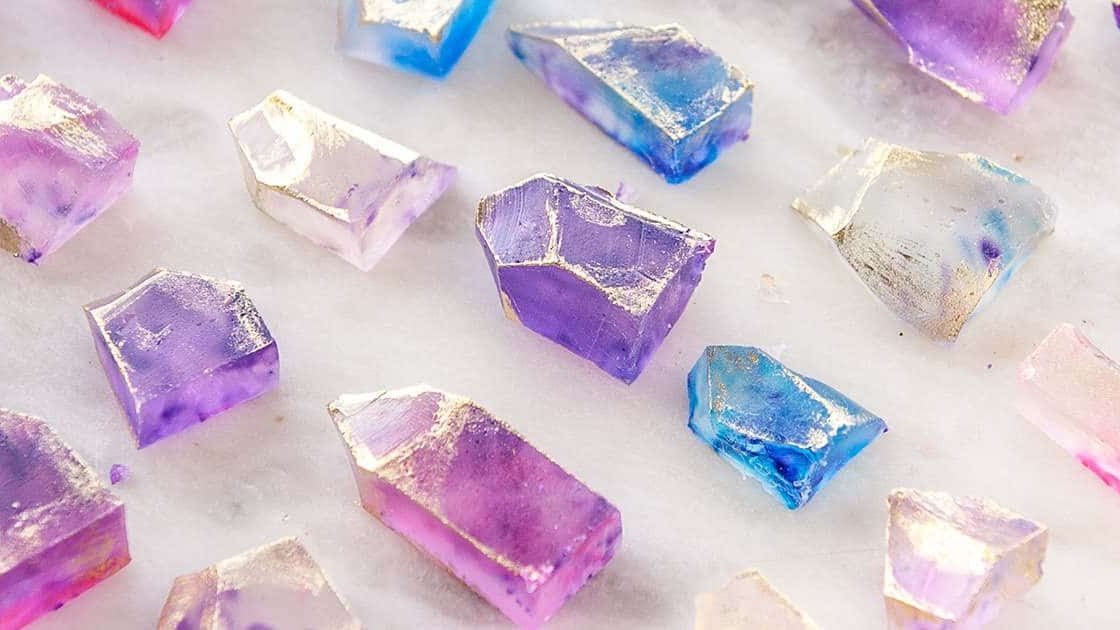
Have you ever marveled at the sparkling beauty of crystal candy and wondered how these dazzling treats are made? Crystal candy, also known as rock candy, is a delightful confection that captures the allure of shimmering crystals while providing a sweet treat. This enchanting candy can be as much a feast for the eyes as it is for the taste buds. Creating crystal candy at home is not only a fun and engaging experience but also an educational journey into the fascinating world of sugar science. Whether you're a budding scientist or a curious candy-maker, learning how to make crystal candy is an excellent way to explore the magical transformation of simple ingredients into a crystalline masterpiece.
The process of making crystal candy involves the crystallization of sugar, a method that dates back centuries. This simple yet intriguing process uses the natural properties of sugar to form beautiful, gem-like structures over time. By slowly allowing sugar to crystallize, you can create stunning, edible decorations that can be enjoyed as a sweet treat or used to embellish desserts and beverages. The allure of crystal candy lies not only in its taste but in the mesmerizing process of watching sugar crystals grow and develop over a period of days.
In this comprehensive guide, we will explore the step-by-step process of how to make crystal candy, from preparing the sugar solution to observing the growth of the crystals. You will learn about the science behind crystallization, the materials needed for the project, and tips for ensuring successful crystal growth. Whether you’re making crystal candy for a science project, a special occasion, or simply to satisfy your sweet tooth, this guide will provide you with all the information you need to create your very own sparkling confections. Let's dive into the world of crystal candy and discover the joy of turning sugar into dazzling crystals.
Table of Contents
Understanding Crystallization
Crystallization is a natural process that occurs when a solid forms with an organized and repeating pattern. In the case of sugar, crystallization involves the transformation of dissolved sugar molecules into solid crystals. This process is driven by the principle of supersaturation, where a solution contains more dissolved solute than it can normally hold at a given temperature. As the solution cools or evaporates, the excess sugar molecules begin to bond together, forming solid crystals.
For crystal candy, sugar is dissolved in boiling water to create a supersaturated solution. As the solution cools, sugar molecules slowly come out of the solution and attach to a surface, forming crystals. This process can take several days, during which time the crystals grow in size and complexity. The rate of crystal growth and the size of the crystals can be influenced by factors such as temperature, the concentration of the solution, and the presence of impurities.
Understanding the science of crystallization can help you control the process and achieve the desired results when making crystal candy. By manipulating variables such as the amount of sugar, the temperature of the solution, and the environment in which the crystals grow, you can create candy with different textures and appearances. Whether you’re aiming for large, clear crystals or smaller, more colorful ones, a basic understanding of crystallization is key to success.
Gathering Materials and Ingredients
Before you begin making crystal candy, it's important to gather all the necessary materials and ingredients. Here's a comprehensive list of what you'll need:
- Sugar: Granulated sugar is the primary ingredient for crystal candy. You'll need several cups, depending on the amount of candy you wish to make.
- Water: Distilled water is recommended to avoid impurities that can affect crystal growth.
- Food coloring (optional): If you wish to add color to your crystal candy, choose food-safe dyes.
- Flavor extracts (optional): For flavored crystal candy, use extracts such as vanilla, mint, or fruit.
- Jars or containers: Clear glass jars or containers work well for observing crystal growth.
- Wooden skewers or strings: These will serve as the base for crystal formation.
- Clothespins: To suspend the skewers or strings in the solution.
- Thermometer: For monitoring the temperature of the sugar solution.
Once you have all your materials, it's time to prepare your workspace. Ensure that your jars or containers are clean and free of any residues. This will help prevent contamination and ensure that your crystals form properly. It's also a good idea to cover your workspace with newspaper or a tablecloth to catch any spills.
Preparing the Sugar Solution
The first step in making crystal candy is to prepare the sugar solution. This is a critical step as it sets the stage for crystallization. Follow these instructions to create a perfect sugar solution:
After preparing the sugar solution, you’re ready to move on to the next step: seeding the solution to encourage crystal growth.
Seeding the Solution for Crystal Growth
Seeding is an important step in the crystallization process that involves introducing small crystals or a rough surface to give the sugar molecules a place to start forming crystals. This step helps ensure that crystals grow evenly and as desired.
To seed your crystal candy solution, follow these steps:
With the skewers or strings properly seeded and suspended, you can now place the jars in a quiet, undisturbed location to allow crystallization to occur. The process can take several days to a week, depending on the temperature and humidity of the environment.
Monitoring Crystal Growth
As your crystal candy begins to form, it's important to monitor the growth to ensure that you're on track to achieving your desired results. Here are some tips for observing and managing the crystallization process:
- Check Daily: Observe the crystals daily to track their growth and make any necessary adjustments. Look for well-formed, clear crystals that are evenly distributed along the skewer or string.
- Adjust Environment: If crystals are not forming or are forming unevenly, consider adjusting the temperature or humidity. Warmer temperatures tend to speed up the crystallization process.
- Avoid Disturbance: Keep the jars in a stable location where they will not be knocked over or jostled. Movement can disrupt the formation of crystals.
By carefully monitoring the growth of your crystal candy, you’ll ensure that the crystals form beautifully and are ready to harvest when the process is complete.
Troubleshooting Common Issues
While making crystal candy is a straightforward process, you may encounter some challenges along the way. Here are solutions to common issues that may arise:
- Crystals Not Forming: If no crystals are forming, check the sugar concentration in your solution. It may not be supersaturated enough. Try reheating the solution and adding more sugar.
- Crystals Forming on the Container: If crystals are forming on the sides or bottom of the jar instead of the skewer, ensure that the skewers are seeded correctly. You may need to re-seed them and start again.
- Cloudy Crystals: Cloudy crystals can result from impurities in the solution. Use distilled water and ensure your jars and utensils are clean.
By understanding these common issues and how to resolve them, you’ll be better equipped to achieve successful crystal candy growth.
Harvesting and Storing Your Crystal Candy
Once your crystal candy has reached the desired size and appearance, it's time to harvest and store it properly. Follow these steps for successful harvesting and storage:
With proper harvesting and storage, your crystal candy will remain a delightful treat that can be enjoyed for weeks to come.
Flavoring and Coloring Your Crystal Candy
One of the joys of making crystal candy is the ability to customize it with different flavors and colors. Here's how you can add your personal touch to your candy:
- Flavoring: Add a teaspoon of your favorite flavor extract to the sugar solution before it cools. Popular options include vanilla, mint, and fruit flavors.
- Coloring: Use food coloring to create vibrant and eye-catching crystal candy. Add a few drops of coloring to the solution and stir until evenly distributed.
By experimenting with different flavors and colors, you can create a variety of crystal candies to suit any occasion or preference.
Creative Uses for Crystal Candy
Crystal candy is not only a treat to be enjoyed on its own but can also be used creatively in various ways:
- Decorations: Use crystal candy to decorate cakes, cupcakes, and desserts for a sparkling touch.
- Beverage Garnish: Add a crystal candy stick to drinks for a sweet and decorative garnish.
- Party Favors: Package crystal candy in decorative bags or jars as party favors or gifts.
With its stunning appearance and sweet taste, crystal candy offers endless creative possibilities.
Safety Tips and Considerations
Making crystal candy involves handling hot sugar solutions and should be done with safety in mind. Here are some tips to ensure a safe candy-making experience:
- Supervision: Children should be supervised by an adult when making crystal candy, especially when handling hot liquids.
- Protective Gear: Use oven mitts or protective gloves when handling hot pots and pans.
- Clean Workspace: Keep your workspace clean and free of clutter to avoid accidents.
By following these safety tips, you can enjoy the process of making crystal candy while minimizing risks.
Educational Benefits of Making Crystal Candy
Beyond its culinary appeal, making crystal candy offers a rich educational experience. Here are some of the ways it can benefit learning:
- Science Exploration: Learn about the principles of crystallization, supersaturation, and the properties of sugar.
- Hands-On Experimentation: Engage in hands-on learning by observing and manipulating variables in the crystallization process.
- Creativity and Innovation: Experiment with different flavors, colors, and techniques to create unique candy.
By integrating science and creativity, making crystal candy can be a valuable educational activity for learners of all ages.
Frequently Asked Questions
Conclusion
Making crystal candy is a delightful blend of science and creativity that results in a sweet, sparkling treat. By understanding the process of crystallization and following the steps outlined in this guide, you can create your own beautiful and delicious crystal candy at home. Whether you're making it for educational purposes or simply for fun, the experience offers valuable insights into the world of sugar science and provides a rewarding outcome that everyone can enjoy. So gather your ingredients, set up your workspace, and embark on the exciting journey of making crystal candy. Happy candy-making!
For more detailed guidance and advanced techniques on making confectioneries, consider exploring resources from culinary schools or confectionery experts. Always remember that practice makes perfect, and each batch of crystal candy is a new opportunity to learn and improve your skills.
Article Recommendations
ncG1vNJzZmiclaK8b7HNnqmgoaOirrPAjaemaJ6ipLu1uMinnKedp6h%2BenvHqK5mrJ9iuqK3xGaaq7Gjqa6tecKapZ2xXp3Brrg%3D